If you’re an avid bowler, you know that a well-maintained bowling ball is key to achieving a consistent, powerful roll and hitting those strikes.
However, after countless games on oily lanes, your ball’s coverstock can become caked with oil and grime, leading to a dull, lackluster performance.
That’s where deep cleaning comes in – a thorough process that removes built-up dirt, oil, and debris from the porous coverstock, restoring your ball to its peak condition.
In this comprehensive guide, we’ll walk you through the steps to deep clean your bowling ball like a pro, so you can get back to dominating the lanes.
The Importance of Deep Cleaning
A bowling ball’s coverstock is made of porous materials like reactive resin or particle/composite coverstocks, which are designed to absorb lane oil for increased traction and hook potential.
However, over time, this oil absorption can cause a build-up of grime, not only creating an unsightly appearance but also compromising the ball’s performance.
Signs that your bowling ball needs a deep clean include:
- Dull, lackluster appearance of the coverstock
- Diminished traction and hook potential
- Poor backend reaction and missed pocket shots
- Dark streaks or discoloration on the surface
By regularly deep cleaning your ball, you can remove this built-up gunk, reviving the coverstock’s original traction and restoring its out-of-the-box reaction. A clean ball will hook more consistently, create better entry angles, and ultimately lead to higher scores.
What You’ll Need
Before starting the deep cleaning process, gather the following supplies:
- Bowling ball cleaner or rejuvenator solution (check manufacturer recommendations)
- Large ball cup or bucket
- Microfiber towels or soft-bristle brush
- Access to warm water
- Surface to work on (counter, table, etc.)
- Optional: Bowling ball polish or restorer
Step 1: Surface Cleaning
Start by giving your ball a basic surface cleaning to remove any loose dirt or debris. Fill your ball cup with warm water and use a microfiber towel to gently wipe down the entire coverstock surface. Let the ball soak for 5-10 minutes to help loosen any caked-on grime.
Pro Tip: For extra cleaning power, add a small amount of bowling ball cleaner or rejuvenator to the warm water during this initial soak.
Step 2: Deep Cleaning Solution
Next, it’s time to prepare the deep cleaning solution. Follow the manufacturer’s instructions to properly mix your bowling ball cleaner or rejuvenator with water in the ball cup or bucket. Using the correct ratios is crucial to avoid damaging your ball’s coverstock.
Many cleaners recommend a 1:4 or 1:6 ratio of cleaner to water, but be sure to check the specific product guidance. Once mixed, pour the solution into the ball cup, ensuring there’s enough to fully submerge your ball.
Step 3: Soaking the Ball
Gently lower your ball into the cleaning solution, ensuring it is completely submerged. Let it soak for the recommended time, typically between 15-30 minutes. During this soak, the cleaning solution will penetrate the porous coverstock, breaking down and dissolving built-up oil, dirt, and grime.
Pro Tip: For heavily soiled balls or those with stubborn stains, you may need to soak for up to an hour or potentially use a more intensive cleaning solution like a ball reviver or resurfacer.
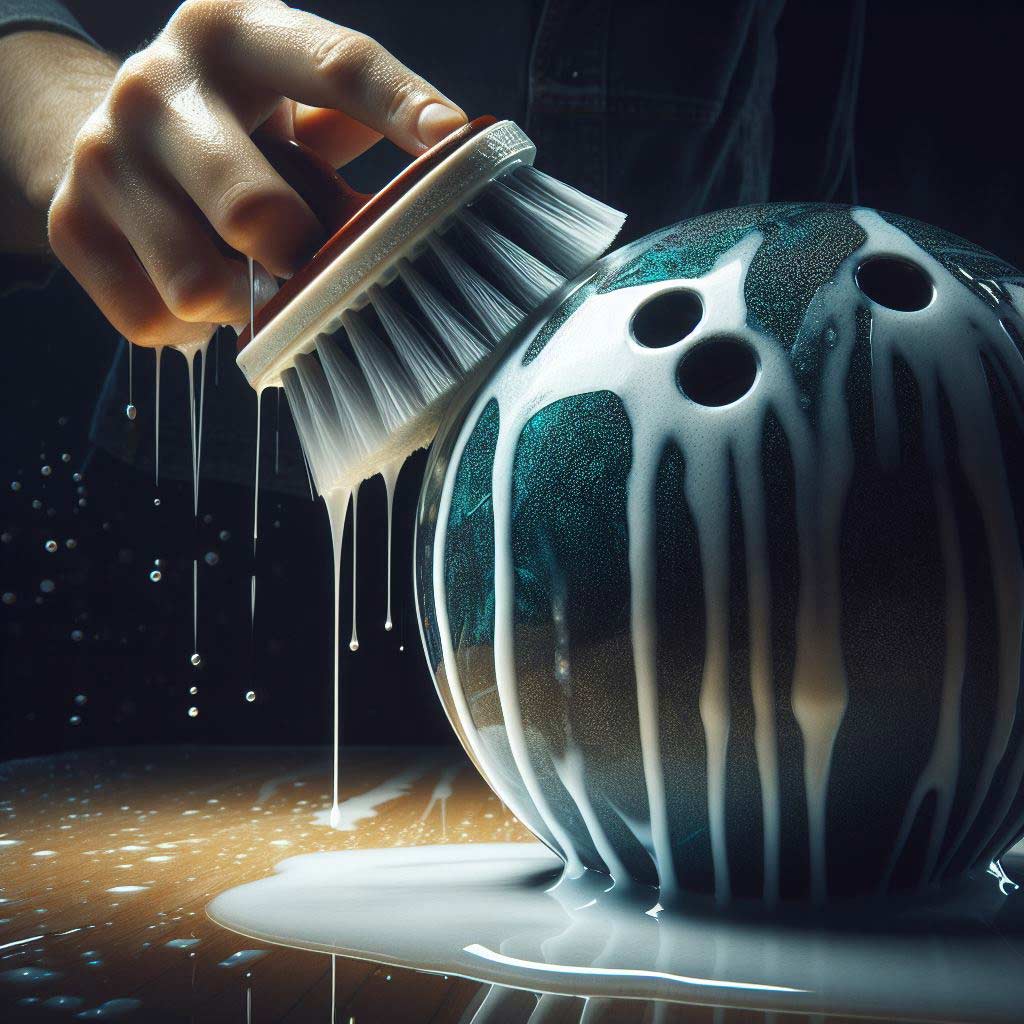
Step 4: Scrubbing the Coverstock
While your ball is soaking, it’s time to get scrubbing. Using a dedicated microfiber towel or soft-bristle brush, gently scrub the entire coverstock surface in overlapping sections. Pay extra attention to any discolored or heavily soiled areas, applying more pressure as needed.
This scrubbing action, combined with the cleaning solution, will help dislodge and remove even the most stubborn grime and oil build-up. Be sure to scrub the entire surface, including the finger holes and any engravings or logos.
Pro Tip: For reactive resin coverstocks, use a gentler touch and a soft microfiber towel to avoid damaging the porous surface.
Step 5: Rinsing and Drying
After a thorough scrubbing, it’s time to rinse your ball. Remove it from the cleaning solution and hold it under a steady stream of warm water, ensuring all traces of the solution are rinsed away. Use your fingers or a towel to gently wipe away any remaining residue or loosened grime.
Once fully rinsed, use a clean, dry microfiber towel to thoroughly dry the ball’s surface, inspecting for any missed spots or remaining stains as you go. If you notice any stubborn areas, you may need to repeat the soaking and scrubbing process or use a more intensive cleaning product.
Advanced Tips
For severely discolored or burned areas on the coverstock, you may need to use a more aggressive ball reviver or resurfacer solution. These products work by gently abrading and polishing the coverstock surface, removing the damaged outer layer to reveal fresh material underneath.
After a deep clean, your ball’s coverstock may appear dull or dry. To restore its original luster and traction, consider using a bowling ball polish or restorer product. These specialized products contain conditioning oils and polishes that rejuvenate the coverstock, leaving it looking and performing like new.
In some cases, even with thorough home cleaning, your ball may still exhibit performance issues or a heavily damaged coverstock. In these situations, it’s best to seek professional resurfacing services from your local pro shop. They have specialized equipment to completely strip and refinish your ball’s coverstock, restoring it to peak condition.
Cleaning Frequency
So, how often should you deep clean your bowling ball? As a general guideline, aim to give your ball a thorough deep cleaning every 30-60 games or as needed based on its appearance and performance.
However, if you frequently bowl on heavily oiled lane conditions or participate in tournaments with excessive oil patterns, you may need to deep clean more frequently, such as every 20-30 games.
Keep an eye on your ball’s reaction and appearance – if you notice a significant drop in hook potential, dullness, or visible grime build-up, it’s time for another deep cleaning session.
Benefits of Regular Deep Cleaning
By incorporating regular deep cleaning into your bowling ball maintenance routine, you’ll reap numerous benefits:
- Restored coverstock performance: A clean, well-maintained coverstock will provide optimal traction and hook potential, leading to more consistent ball motion and improved pin carry.
- Extended ball lifespan: Removing built-up oil and grime prevents premature damage to the coverstock, helping your ball last longer before needing resurfacing or replacement.
- Improved appearance: A clean, polished ball simply looks better on the lanes, projecting a professional and well-maintained image.
- Increased consistency: With a clean, properly-maintained ball, you’ll experience more predictable and repeatable shot-making, helping you build confidence and consistency.
- Cost savings: Proper cleaning and maintenance can significantly prolong the life of your bowling ball, saving you money on frequent ball replacements or resurfacing services.
Conclusion
Deep cleaning your bowling ball is an essential maintenance task that shouldn’t be overlooked. By following the steps outlined in this comprehensive guide, you can effectively remove built-up oil, dirt, and grime from your ball’s porous coverstock, restoring it to peak performance condition.
Remember to gather the necessary supplies, properly mix and use the cleaning solutions, and scrub thoroughly during the soaking process. Don’t be afraid to seek professional assistance or use more intensive cleaning products for heavily soiled or damaged balls.
Incorporate deep cleaning into your regular bowling routine, aiming for a thorough cleaning every 30-60 games or more frequently if needed.
By keeping your ball well-maintained, you’ll experience improved traction, increased hook potential, and more consistent ball motion – all factors that can lead to higher scores and greater enjoyment on the lanes.
So, take pride in caring for your bowling equipment, and make deep cleaning a priority. Your ball, and your scores, will thank you for it.